Loyalty to 4-H but make it art! This month’s blog topic is all about the loyalty us members have to 4-H, but with a twist! Why don’t we create a piece of art to place in your home to show our loyalty to 4-H? The project I thought would work perfect for this is a string art piece! It is quite simple to put together but depending on your age you might need an adult to help you get started. I will be going through the steps on how to complete it! Make sure you stick in until the end, where I will tell you where I had to ‘learn to do by doing’ on the spot and make changes as I went along to help anyone who may have the same issues I did!
Materials
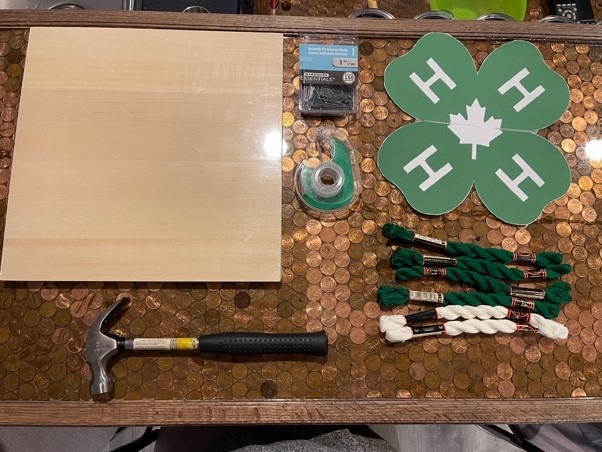
To first get started you will want to gather all of your materials for this project, I used:
- A wooden board
- Finishing nails
- Tape
- A hammer
- Printed 4-H logo
- White embroidery thread / yarn
- Green embroidery thread / yarn
- Scissors
These materials can be picked up from your local craft store or the common items can be found around your house! Along the way, I also added wood stain or paint and a foam brush to apply it to the board!
Let’s Get Started!
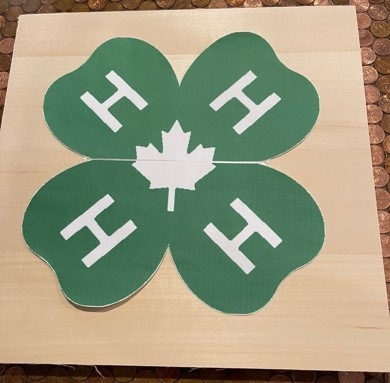
Once you have all your materials gathered, you will want to take your printed 4-H logo and tape it to the center of your wooden board. You will want to make sure your 4-H logo is of appropriate size for the board you have chosen. You don’t want it too big or too small like I had in the beginning.
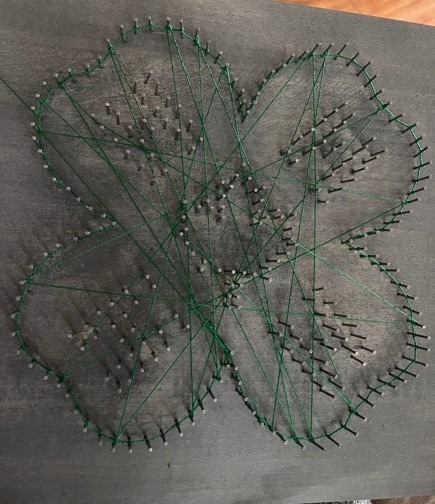
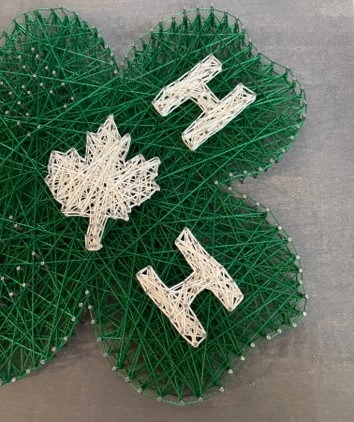
When you have finished taping on your logo, you will begin to hammer your finishing nails into the board! For this step you may need some help from an adult to hammer these nails in. When you are hammering the nails in, you will want to go around the perimeter of the entire clover, the 4 h’s, and the maple leave. When I started hammering, I started from the middle with the leaf and worked my way out to the 4 h’s and then finally did the perimeter of the clover to finish it off. This part has to be the easiest but can also take some time if the nails don’t go in straight. You will only want the nails to be in about 1/3 of the nail deep so there is room for the string to wrap onto them. Also, the nails should be spaced about half a centimeter away from each other, if possible, but they do not need to be exact. You can also just measure with your eyes like I did, you just want enough space in between for the string.
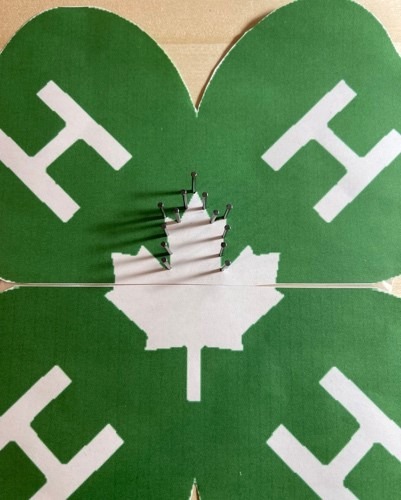
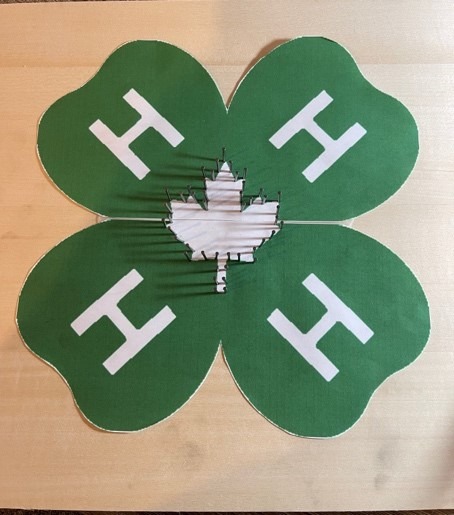
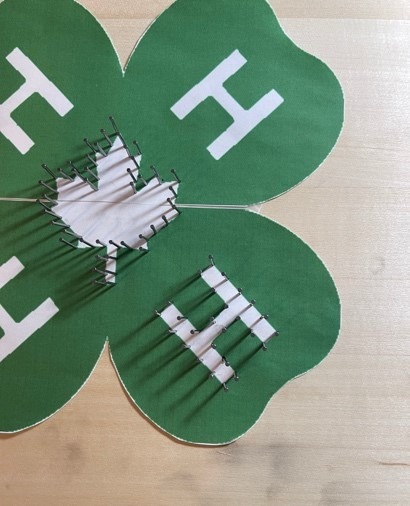
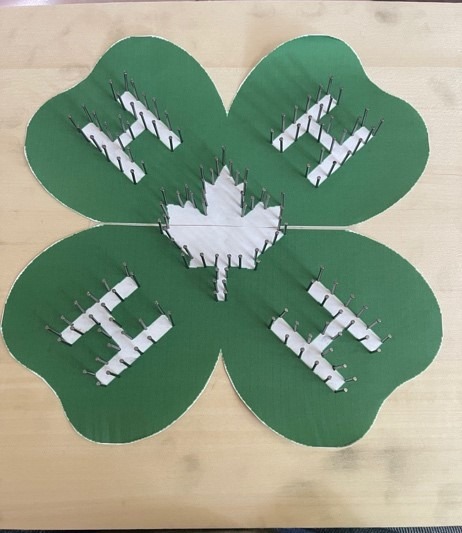
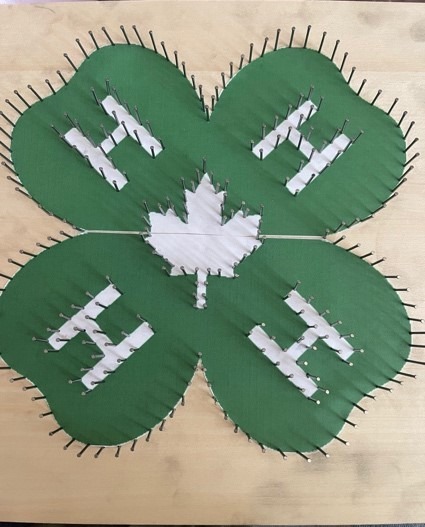
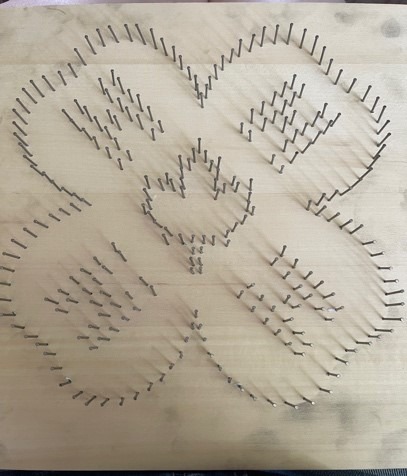
Once you have all the nails in the board you can rip out the picture you have tapped down in the middle because you will not need it anymore. This part can get tricky since you want to make sure you get out all the paper and take from all the smaller and tighter spaces and sometimes it can get stuck in between. If it does get stuck, just take an extra nail you haven’t used to pick it out with.
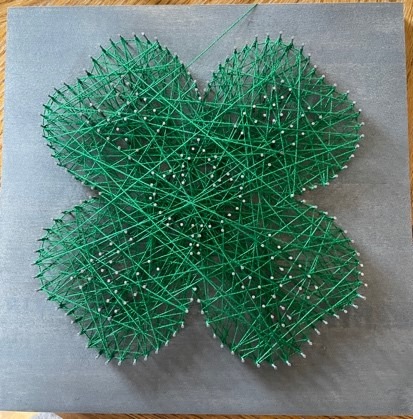
The next step is to start wrapping the string! For this step I used embroidery thread, but you can use yarn as well, as I have before in another project! I started with the green thread in the project because it was going to take the most time to complete because of the amount of surface area and it was the base colour of the project. To begin, I first tied the string end in a double knot, to make sure it would not come undone, then cut off the tail end with the scissors to make it look neat and to hide the end of the string.
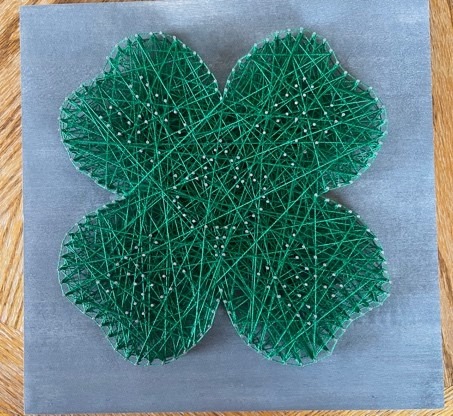
When you first start wrapping the string, you will want to go around the entire perimeter of the clover, wrapping it around each nail making sure the string is always kept tight. You should also push down the wrapped string on each nail so there is room for more to be wrapped on the nails. Then when around the perimeter once, you can begin to go from random nails of the clover until it is completely filled and covered in green, or until your desired amount of area is covered! To finish off the clover you will want to go around the entire perimeter of it again, wrapping the string on each nail once more to make it have a nice clean finish to it! When you are done with the green string, you will want to tie it in a double knot to a nail of the clover, just as we did in the beginning and cut off the tail as well!
We are getting so close to finishing this art piece! Next is the white string, weather you chose yarn or embroidery thread. With the white, I started with the maple leaf in the middle. The nails could be harder to see here because the green will be weaved through them from doing the clover. You will want to start off by tying the string off to one of the nails with a double knot and cutting off the tail just like we did with the clover. You will then want to go around the perimeter of the maple leaf to create the outline you will be working in. Make sure you hit every nail with the yarn and make sure it is in the right pattern, as I did put the string on the nails in the wrong order at times! Once the perimeter is complete, you can begin to wrap the string on the nails in random order to fill the maple leaf and make it white! When you get the desired amount of white in the maple leaf that you would like, you will want to go around the perimeter of the leaf once more to finish it off, then tie the string in a double knot to one of the nails and cut off the tail!
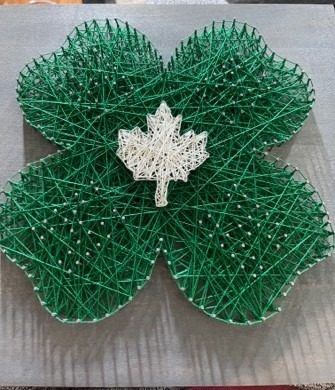
The next and final step is to do the 4 H’s in the piece! You will want to repeat the same steps as we have been doing for each part for this part as well! You will first tie off the string and double knot it to one of the nails, then cut off the tail. You can begin wrapping the string around the perimeter of the H, then when done that you can start to fill it in randomly inside of the H. Once that is finished, you will tie off the string to one of the nails and double knot it, then cut off the tail! You will want to repeat this step for the other 3 H’s in the piece to completely finish it!
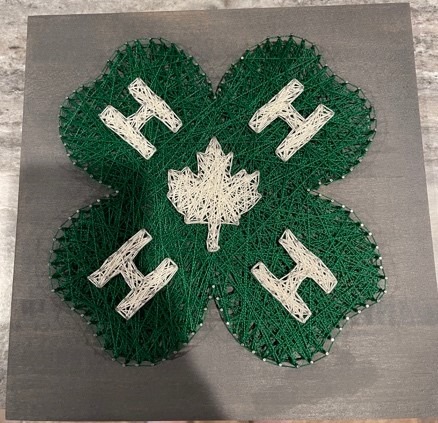
Finally, we have finished the project and you are left with a beautiful piece of art that also shows the loyalty you have to 4-H! Now you may think that this wonderful project went very smooth for me when I was creating it, but I can honestly tell you that it went the complete opposite!
Learning To Do By Doing!
I first started to have problems when I started, and my logo was just too small for the board I chose. I had a hard time getting a big enough picture without it cutting off while printing. I played with the image for quite some time on my computer when I finally got it big enough by cutting it in half and printing each half separate on its own sheet of paper, then taping them together to cover a larger portion of my board!
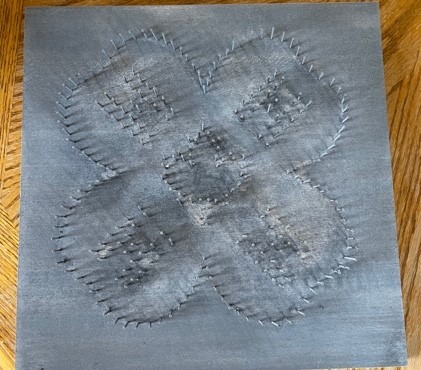
Another issue I had that played a big part was with the nails. The nails in the package that I got were fairly dirty for storage purposes I’m assuming, and I never realized it until I was about half done with hammering the nails in. My board was covered in black marks from my hands when I was handling the nails. I did not really want to leave it because I wanted it to look complete, so I decided to stain it a grey colour. Paint would also work for this as well and I suggest doing this step before you begin hammering the nails in and taping your picture down so it will be easier to evenly coat the wood.
One of the other problems I had was with the thread. When I began to wrap it around the nails the thread began to get tangled and knotted when I unraveled it to use it. I came to find out, after having to deal with some pretty big knots, that you should completely unravel the thread before you start to wrap it around the nails, so it doesn’t get knotted up on the other side! Also, when it came to the thread, I found it liked to sometimes fall off the nails or unwrap off of them. When this happened, I realized that the thread already wrapped on the nails needed to be pushed down to create more room for more thread to be wrapped.
Final Thoughts
Overall, this project was a lot of fun to create and I am very happy with the results! Even with the problems I encountered, there was always a way to fix it to make it easier for the next time! In complete 4-H fashion, I had to ‘Learn To Do By Doing’ with this project, but that just shows how much 4-H has taught me over the years, to never give up. This project shows me how loyal I am to 4-H because of all the learning opportunities and skills I will have forever! If you also choose to create this project, we at 4-H Ontario and the 4-H Ambassadors would love to see it! Please share it with us or tag us in it on social media so we can see your great pieces of art!
Thank you to our sponsor, FS, for their ongoing support and leadership of the Ambassador Program.